
Packapost - Step by Step Setup Guide
These instructions have been developed for full size Rugby Packaposts. They aim to give the user a basic understanding of how to set up, pack away and secure posts. Before set up, these instructions MUST be fully read and understood. Failure to do so may result in damage and/or injury and void your equipment warranty. Please read ALL warnings, care and maintenance and assembly instructions which follow.
Setting Up
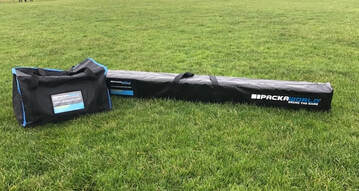
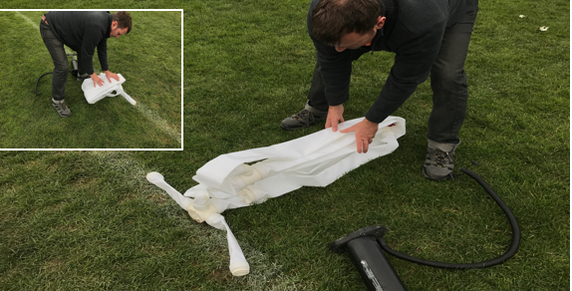
Step 1: Find a level surface and remove rugby uprights (x2) and crossbar pieces (x3) from bags.
|
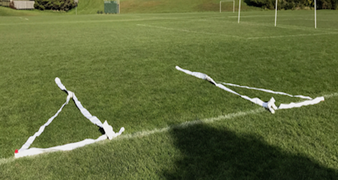
Step 2: Lay out uprights as shown ensuring hose is not twisted.
|
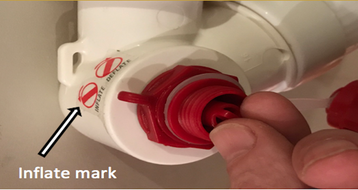
Step 3: Remove the dust cap and turn the valve insert fully anti-clockwise (i.e. toward inflate mark) which closes the valve and retains the air in the hose after inflation.
|
Step 4: Connect the hose of the air pump (to the bottom connector) and pump to FULLY INFLATE uprights. Replace dust caps on valves.
|
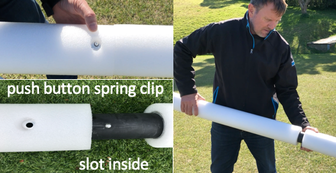
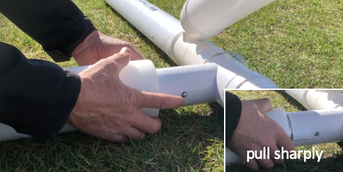
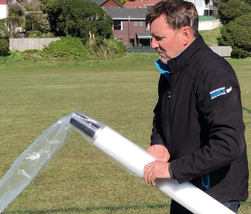
Step 5: Slot together crossbar pieces. IMPORTANT – FULLY ENGAGE PUSH BUTTON spring clips into each of the holes in the crossbar end sections.
|
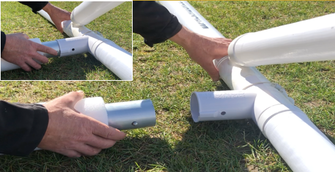
Step 6: Connect crossbar to upright. IMPORTANT – FULLY ENGAGE PUSH BUTTON spring clips into each of the holes in the upright connector.
|
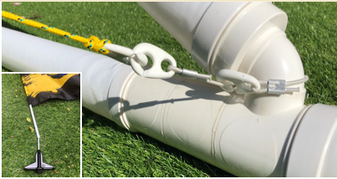
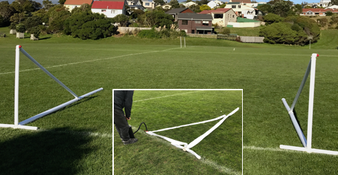
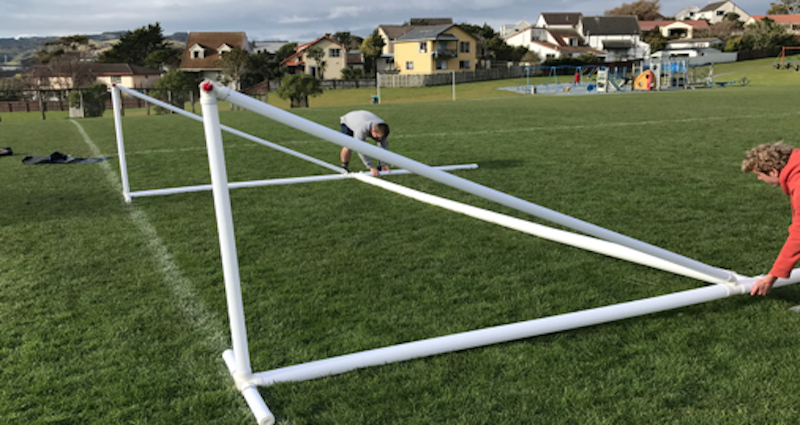
Step 7: Attach guy ropes to uprights (as shown). At this point you can also screw in flag holders into the top of the uprights (flags NOT INCLUDED).
|
Step 8: Raise rugby post to upright position and secure the feet and back stanchion of the upright using ground anchors supplied.
|
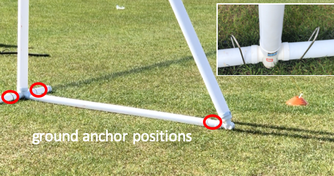
Step 9: Use 3 x ground anchors per upright - two on inflatable feet and one at rear of back stanchion (more can be used if required). Sand/water bags should be used on astro turf.
|
It is strongly recommended that guy ropes are always used to provide additional rigidity and stability - to avoid accidents care MUST be taken to ensure guy rope supports & pegs are labelled (e.g. with high vis. cones or training discs).
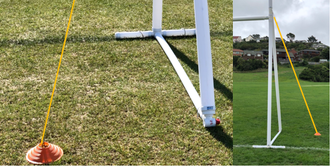
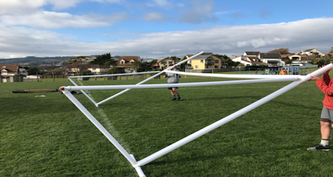
Step 10: Extend connected guy ropes and secure to the side and behind - for guidance this is approx. 3 feet (1m) to the side and 6 feet (2m) behind.
|
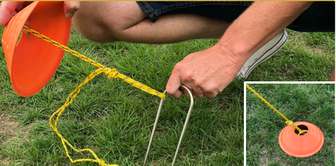
Step 11: To avoid accidents, care MUST be taken to ensure guy rope supports are labelled (e.g. with high visibility cones or discs – not always supplied as standard).
|
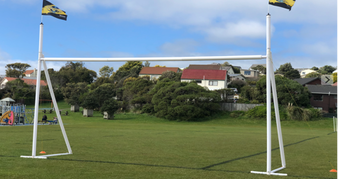
Step 12: Now you are ready to train or play.

|
Packing Away

Step 1: Remove ALL ground anchors and, if used, additional supports.
|
Step 2: Carefully lay post to the ground.
IMPORTANT ensure posts do not fall as this will cause damage. At this point you can remove flag holders & flags (if fitted). |
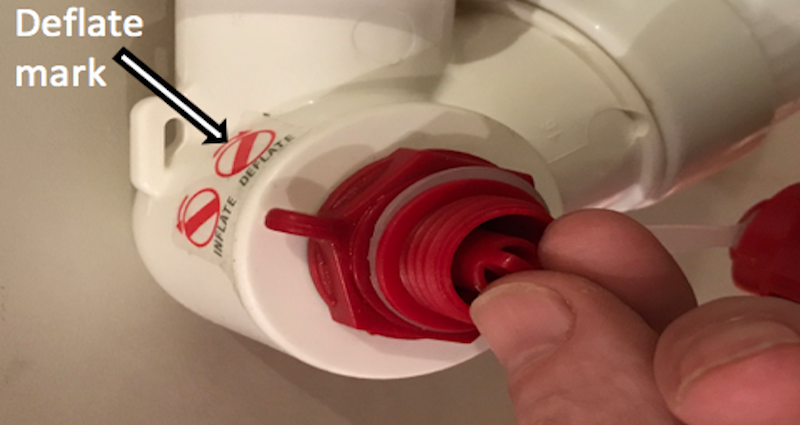
Step 3: Remove dust cap and turn the valve insert, of each upright, fully clockwise to release air. This may require a little push and wiggle to the valve insert.
|
Step 4: Remove the crossbar from uprights by depressing buttons. Continue to remove other sections of crossbar to dismantle. Pack away in the bag provided.
|
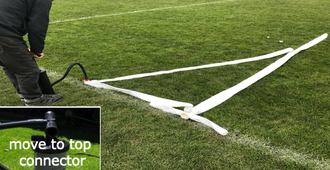
Step 5: Remove ALL residual air from the uprights. To do this move pump hose to top connector and connect other end of pump hose to valve on upright. Air extraction will begin when pumped.
|
Step 6: Once ALL air extracted from uprights, return all valves to closed position, replace dust caps and fold away uprights and crossbar into bags.
|
Additional tips on using Packaposts
A few tips follow on using Packaposts. If you have any tips you'd like to share, please contact us for publication.
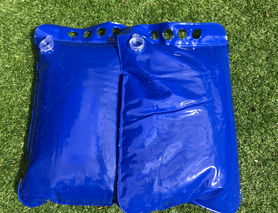
Tip #1For ASTRO TURF surfaces - Instead of using ground anchors, place filled water bags and/or sandbags on feet and along back stanchion of uprights. Additional water bags can be laid on top to secure further.
|
|
IMPORTANT INFORMATION - PLEASE READ BEFORE USING EQUIPMENT
PACKAWORLD DOES NOT ACCEPT ANY LIABILITY WHATSOEVER FOR ANY LOSSES OR DAMAGE THAT RESULT DIRECTLY OR INDIRECTLY FROM THE USE OF PACKAPOSTS IN COMPETITIVE RUGBY GAMES. FOR FURTHER INFORMATION ON WARRANTY CLICK HERE.
- Do not use Packaposts in winds greater than 17 mph / 15 knot winds (Moderate Winds on the Beaufort Scale). Higher wind conditions will compromise the stability of the Packaposts and may cause damage and/or injury and void equipment warranty.
- In windy conditions guy ropes should be used to provide additional support and stability - to avoid injury care MUST be taken to ensure guy rope supports & pegs are labelled (e.g. with high visibility cones or training discs).
- Never drag the inflated Packapost on hard ground as IT WILL damage the hoses that make up the posts.
- ONLY use the hand pump provided to inflate uprights as high pressure mechanical appliances can damage hoses and/or valves and cause injury.
- For ease of packing, make sure you extract the residual air with hand pump before rolling Packapost uprights back into the bag.
- Do not expose Packapost to chemicals such as thinner, gasoline or acetone.
- Do not use Packapost for other than temporary purposes nor leave exposed outside for prolonged periods of time. Exposure to adverse weather conditions and the suns ultraviolet rays can damage the Packapost and/or cause them to discolour.
- Do not use Packapost when they are frozen nor in overly windy conditions as this could damage posts and/or cause injury.
- Do not store your Packapost wet or dirty in the carry bag (even for short periods of time).
- Do not expose Packaworld products to cold temperatures (even when stored) as this can make plastic components brittle resulting in irreparable damage.
- Always use a carry bag for transportation and storing Packapost.
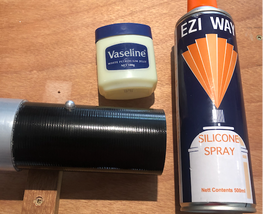
- Packaworld recommend keeping crossbar inserts lubricated (e.g. using petroleum jelly) to ease assembly/disassembly of crossbar.
- Do not force zip when packing Packapost as this can cause damage and put undue strain on the bag causing it to tear.
- Do not stand on, walk on, jump on or drop full body weight on Packapost, especially when deflated.
- Inflate Packapost on even ground, and only use recommended fixings to secure (if required).
- Keep the Packapost away from open flames and any sharp objects.
- Failure to completely follow these guidelines could damage your Packapost, cause personal injury and void your warranty.
PLEASE NOTE THAT PACKAWORLD PRODUCTS ARE TEMPORARY STRUCTURES AND NOT SUITABLE FOR LONG TERM EXPOSURE OUTDOORS. OVER A PERIOD OF TIME THE INFLATABLE FRAMES WILL LOSE AIR AND AS SUCH WILL REQUIRE TOPPING UP WITH THE PUMP SUPPLIED.
Packaposts are protected under European Community Design No. 004001618-001-0002